
After setting up your website and publishing a bunch of content, the next step is to share your website with the world. Google is the biggest search engine on the planet with more than 90 per cent market share. Submitting your website to Google will make your website reach millions of people all around the globe.
Even if you don’t submit your website, Google will be able to find your website but the problem here is that it will take too long. Google won’t be able to index your article soon after publishing it. To speed up the entire indexing process, Google has a tool called Google Search Console (earlier known as Google Webmaster Tools).
What is Google Search Console?
Google Search Console is a tool that will help you get your content on Google. Not just that, once indexed, you can track the performance of keywords and ranking pages, and optimize your website in terms of SEO to rank higher.
Search Console is a free tool available to all website owners. The whole process of adding the website to Google and submitting the sitemap takes less than 5 minutes.
So, let’s see how to get started with Google Search Console and submit your website to Google to rank higher and track site traffic and performance.
How to Submit Website to Google?
Before going in make sure that you have access to your domain’s DNS manager and a Gmail account.
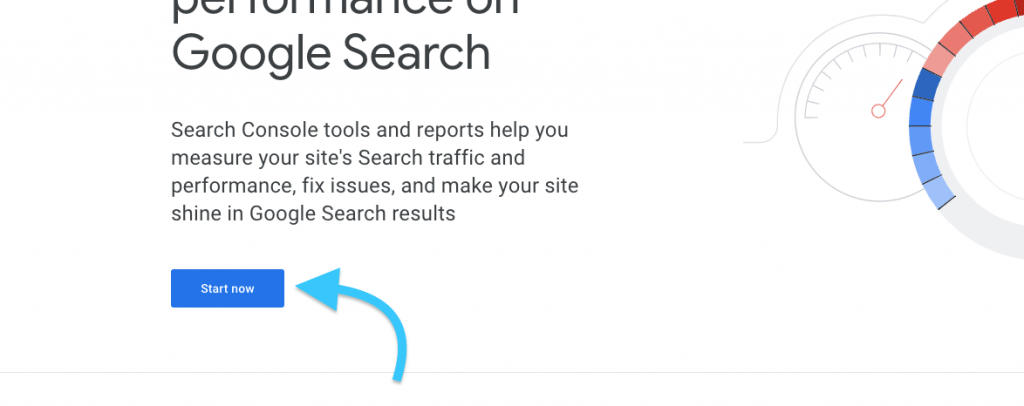
Step 1: First of all, go to Google Search Console and click on the Start Now button. Make sure you are logged in to your Google account.
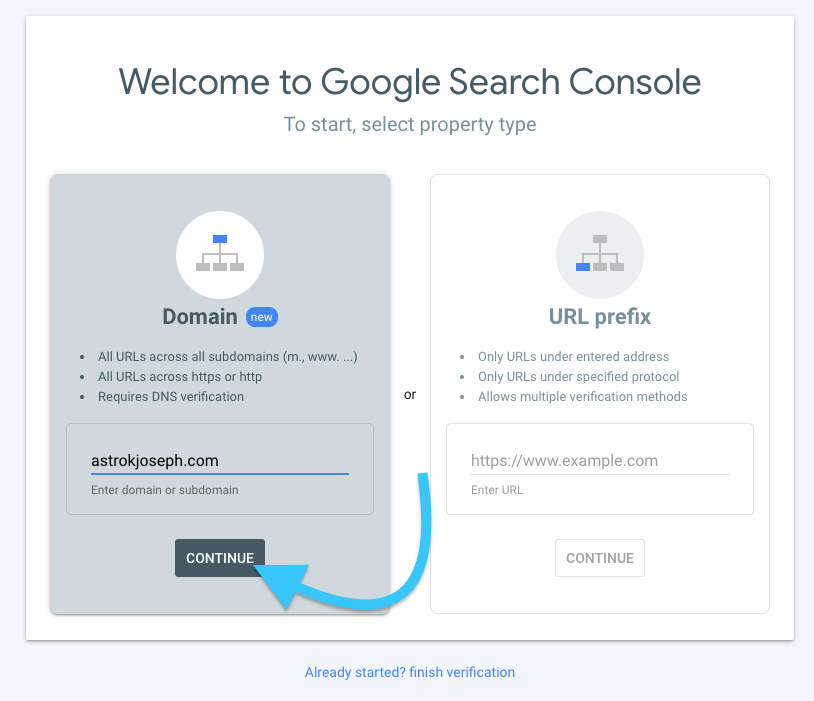
Step 2: It will now ask you to either enter the Domain or URL prefix.
If you want to add all versions of the domain along with subdomains and subdirectories then just enter the domain only. Example: astrokjoseph.com
Or if you want to add URLs under entered address or URLs under specific protocol then enter it in the URL prefix field. Example: https://www.astrokjoseph.com
In my case, I am going to enter the entire domain along with all subdomains and protocols. So, I will type just my domain name and click Continue.
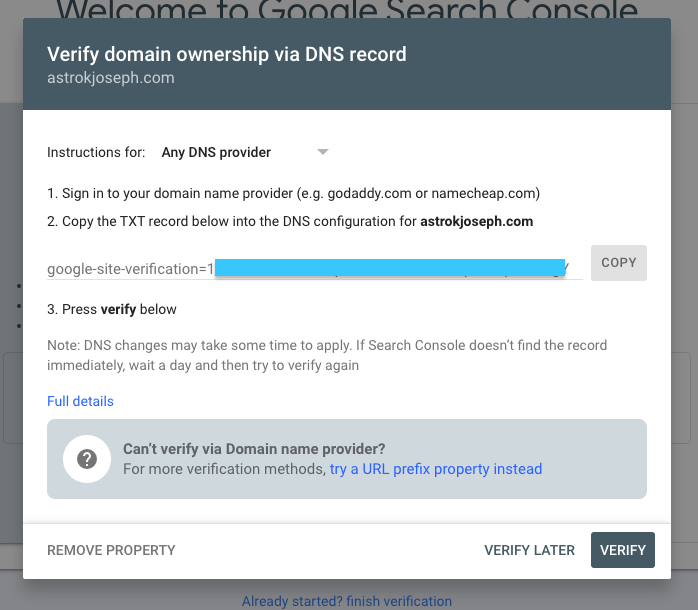
Step 4: Now we need to verify our domain. We need to create a new TXT record on DNS configuration and add the content given.
Step 5: Log in to your domain registrar’s website and go to the DNS tab.
(DNS configuration for different registrars will be different. You may refer to the knowledge panel or resource centre to find details on how to add TXT records.)
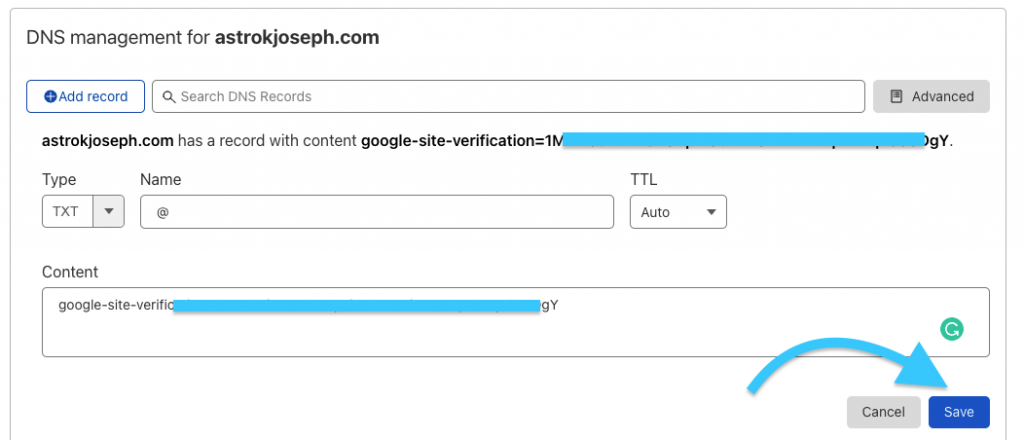
Step 6: In my case, I am using Cloudflare. So, I will move to the DNS tab.
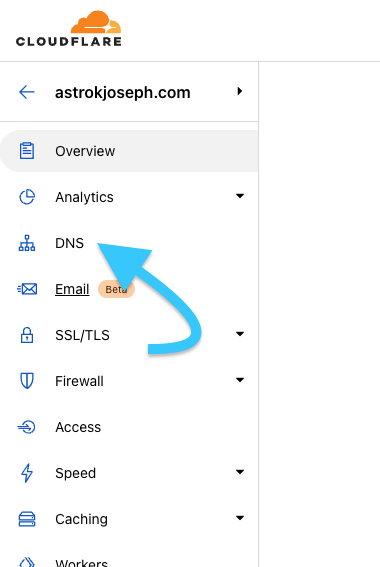
Step 7: Click on the Add Record button
Select the Type as ‘TXT‘ and enter @ or your domain address in the Name section. Now, you need to copy the content and paste it into the Content section and click Save. (Keep TTL as Auto).
Once the new TXT record is added, wait for a couple of minutes before proceeding further. It will take a few minutes for the DNS propagation to complete.
Step 8: Now, go back to Google Search Console and click on the Verify button.
You will see a message like ‘Ownership Verified.
To confirm, you may go to Settings > Ownership verification and you sould find something like ‘You are a verified owner’.

Submit Sitemap to Search Console
The very next thing to do is to submit your website’s sitemap to Search Console so that Googlebots can easily find new updates on your websites.
For this, you should already have a sitemap for your website. You may use plugins like Yoast SEO for generating a sitemap. There are tons of plugins that will let us to create a sitemap for our WordPress website.
Copy the address or URL of the sitemap page and go to Search Console.
From the options one the left side of the screen, click on Sitemaps under Index.
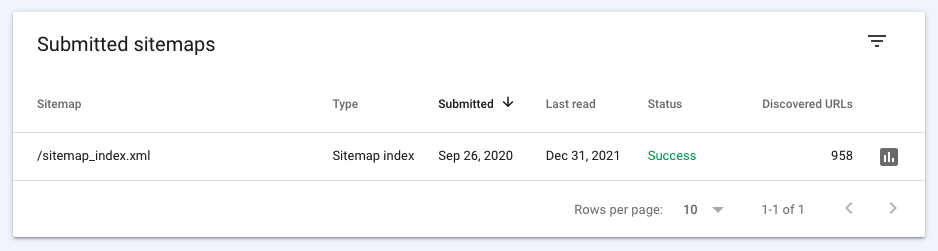
Paste the URL in the Add a new sitemap field and click Submit.

It will take some time for Google to process the new sitemap. It may take couple of days depending on the size of the Sitemap of your website.
If your website have multiple sitemaps, then you may repeat the same process and submit all of them to Google.
Submit Individual Pages to Google
If you want Google to quickly update a page from your website in it’s index then you may use the Fetch as Google tool.
Let’s say that you updated a page on your website and want Google to index the newer version as soon as possible. In this case, we have the option to manually submit individual page for indexing.
Let’s see how to submit new or existing pages on Google for indexing/updation.
- Login Search Console and select the property
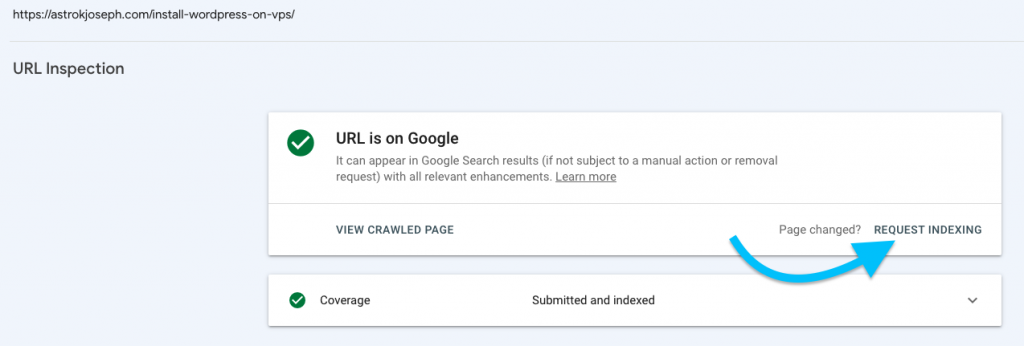
- Enter the URL in the search field provided on the top and hit enter.
- Wait for a few seconds for Google to pull data from its index.
- Now click on the REQUEST INDEXING button and wait for sometime.
Now you have successfully submitted a new page/URL for indexing/updating in Google.
Google might index/update submitted URL if it passes the checks.
Final Words
This is how we use Google Search Console to submit our website or individual pages to Google. Adding sitemap in Search Console will increase the overall speed of indexing. It is always recommended that you submit the site to Google Search Console so that you can get actionable data and performance statistics right from Google itself.
Apart from Google, also make sure to submit your website to other leading search engines like Microsoft Bing, etc.