WordPress is undoubtedly the most used and best content management system (CMS) out there. WordPress powers almost 40% of all the websites on the Internet. To get a website up and running, you can install WordPress on a server. Talking about servers, it can be shared hosting, dedicated hosting or VPS hosting.
In this article, we are specifically talking about installing WordPress on a VPS server aka Virtual Private Server.
If you were about to install WordPress on a Cpanel enabled shared hosting then things would have been super easy. You got Softaculous one-click WordPress installer on shared hosting which will let you install WP in a couple of clicks.
When it comes to the manual installation of WordPress on a VPS without using a control panel, things might feel a little overwhelming. But trust me, I will make this guide as easy as possible so that any people without any technical knowledge can install WordPress on VPS.
Advantages of installing WordPress on VPS?
As mentioned earlier, there are tons of hosting options like Shared hosting and Dedicated hosting. Now, why on earth would you want to use VPS hosting? VPS hosting is an intermediate to shared hosting and dedicated server. This means it will be slightly expensive than a shared server with a performance matchable to that of a dedicated server.
- Increased performance improvements than shared hosting
- More control over the server
- Advanced options to configure the sever as per your likings
How to install WordPress on VPS: The Easiest Way
When it comes to installing WordPress on VPS, there are tons of methods and stacks available. You can select any one of your choice. If you do not want to use a prebuilt stack then you can even install WordPress and all other server components manually as well.
But, to make things easier, we are using WordOps stack to install WordPress on VPS. WordOps is by far one of the easiest and quickest methods of installing WordPress on VPS.
If you go with WordOps, then you are not required to configure the server all by yourself. All you have to do is install WordOps on the server and get WordPress installed on the same.
You will have to play with a few lines of codes in the terminal but don’t worry, it is not that tough as it sounds.
1. Select the VPS Provider
There are tons of VPS server providers out there. All of them comes with their own pros and cons. Certain features might be available in a VPS company while they might not be available in another.
Popular VPS providers are:
- DigitalOcean
- Vultr
- Linode
- UpCloud
- Google Cloud Platform
- Amazon AWS
You can select any VPS hosting company of your choice. But I will use DigitalOcean in this article.
DigitalOcean is a great feature-rich and affordable cloud VPS provider. When compared with other industry-leading VPS providers, DigitalOcean’s features and user-friendly UI makes it a great choice.
First of all, you need to register an account on DigitalOcean.
Use the link given below to get a $100 welcome credit to use DigitalOcean.
You may also use managed hosting providers like Cloudways as well.
2. Configure the VPS
Now that we have created an account on the cloud hosting provider’s website, the next is to configure our first server to install WordPress. In DigitalOcean, a server instance is called a ‘Droplet’.
So, let’s see how to set up a droplet on DigitalOcean.
Once you are there on the DigitalOcean dashboard, click on the Create button from the top right corner and select Droplets.
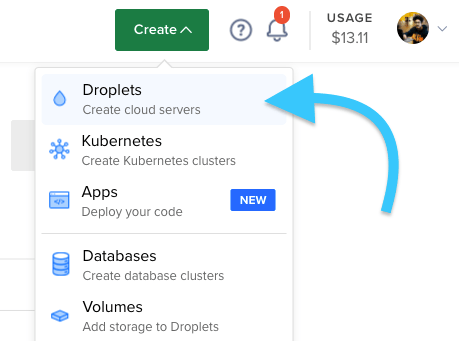
It will now bring all the options to configure your new droplet/server.
Firstly, you need to select the Distributions (OS) to install on your VPS server. You have options like Ubuntu, Debian, FreeBSD, Fedora, CentOS etc. In this tutorial, we are using Ubuntu as the Operating System.
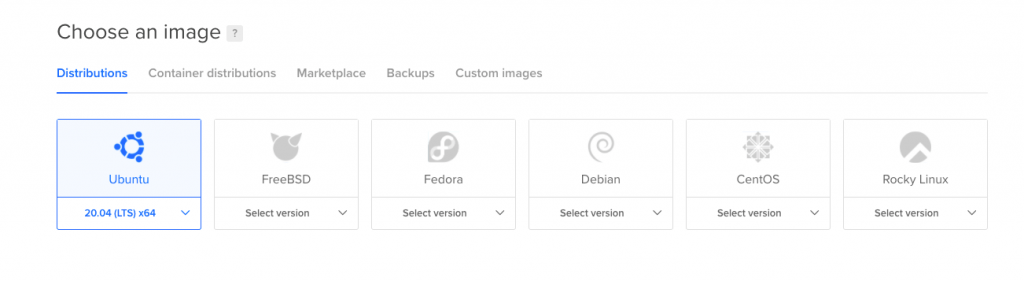
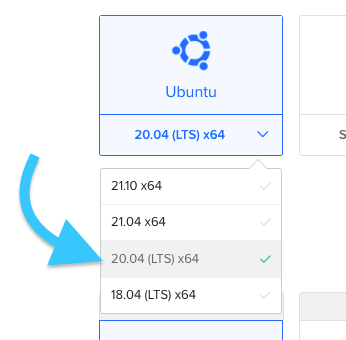
Click on Ubuntu and select 20.04 (LTS) X64. LTS means Long Term Support.
Next, you need to select a plan of choice. There are two different categories with different CPU/RAM and storage configurations.
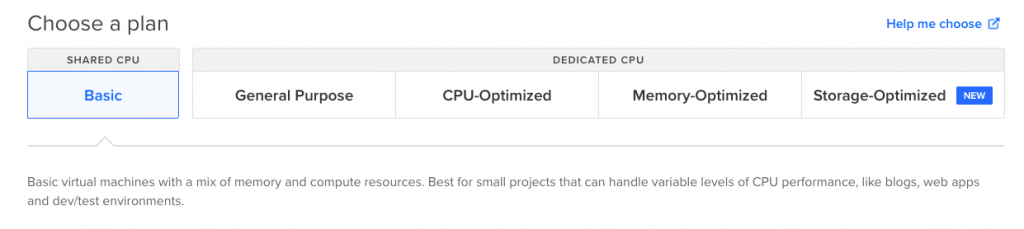
If you are just getting started then a $5 Shared CPU plan will be more than enough for you. If you want. you can also opt for Dedicated CPU plans as well.
As for CPU, you have three options:
- Regular Intel with SSD – Starts at $5
- Premium Intel with NVMe SSD – Starts at $6
- Premium AMD with NVMe SSD – Starts at $6
Premium Intel and AMD will have much better performance than regular Intel. If you are concerned about a minimum level of noticeable website speed improvement then go with Premium AMD or Intel. Choose a plan of your choice depending on the size of the website. If it is a simple blog then the base plan with 1GB RAM, 1 CPU and 25GB SSD storage will be enough.

If you want to add additional storage volumes to the droplet then you can add a block storage unit. You can manually enter the size of your choice and pay accordingly. This option is for those who just want more storage without increasing the RAM or CPU.
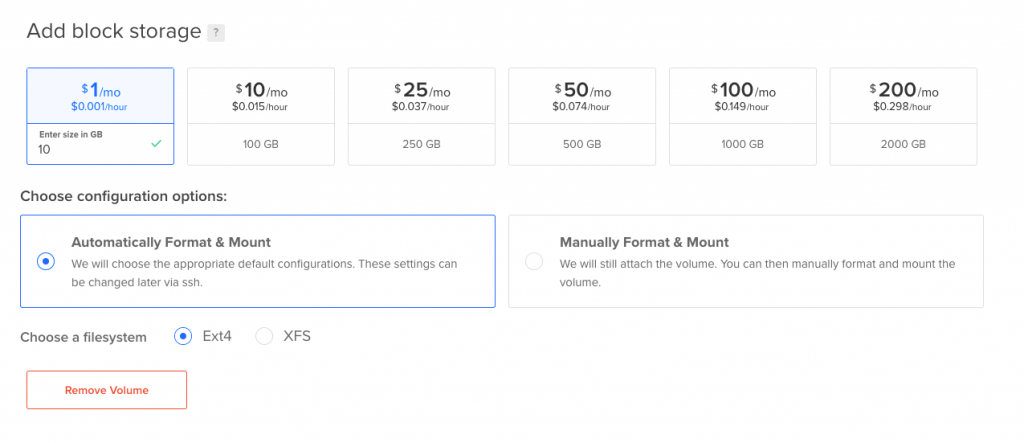
Select Automatically Format & Mount option under Choose configuration options (Block storage). Leave filesystem as default.
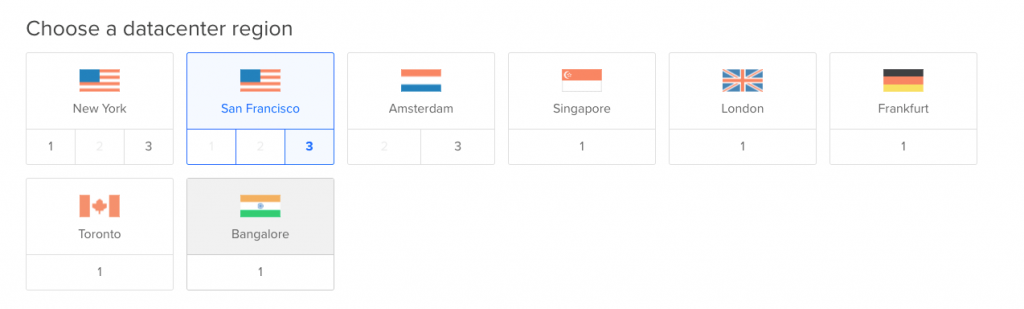
Next is to select the Datacenter region. You can configure your server in any location of your choice. It will be always better to select a data center closest to your target audience. For example, if you are focusing on visitors from the USA then you may select New York or San Fransisco.
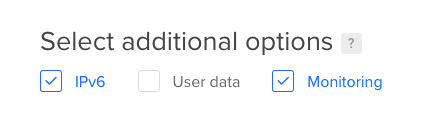
If you want, you can enable IPv6, User Data and Monitoring. I will enable both IPv6 and Monitoring.
As for server Authentication, you can either use an SSH Key or a Password.
Here, I will use a password as the authentication method.
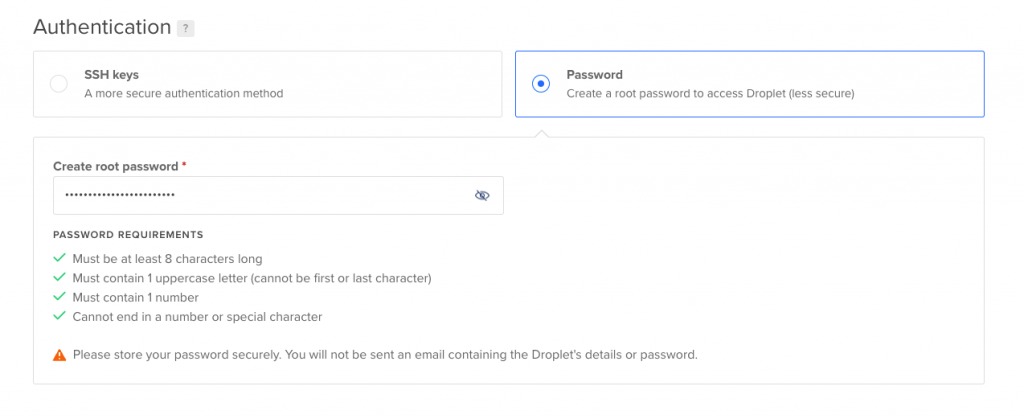
You can also generate an SSH Key using software like PuTTY and upload the same here.
Select the Droplet count as 1.
You may give the server a hostname of your choice. It should only contain both lowercase and uppercase characters, dashes and periods.

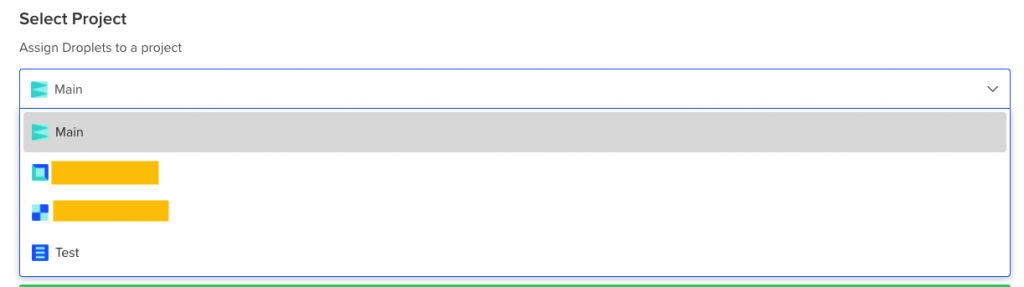
Select the Project to which you want to add the Droplet.
Optionally, also enable backups if you want DigitalOcean to take a system-level backup once a week and retain them for 4 weeks. It will cost you 20% of the droplet’s price/month.

Finally, click on the Create Droplet button and wait for a few seconds until DigitalOcean configures the server for you.

3. Connect VPS to your Domain
Now that we have setup our VPS server, the next thing to do is to point our domain to the server using IP address.
Click on the Droplet’s IPv4 to copy the IP address to the clipboard.

Now login to your domain registrar’s DNS settings page and create a new A record. In the Name field, type your domain name and in the content field paste the copied IP address.

Next we need to create a new CNAME record. Click on add new CNAME record and type www in the name field and your domain name in the Content field.

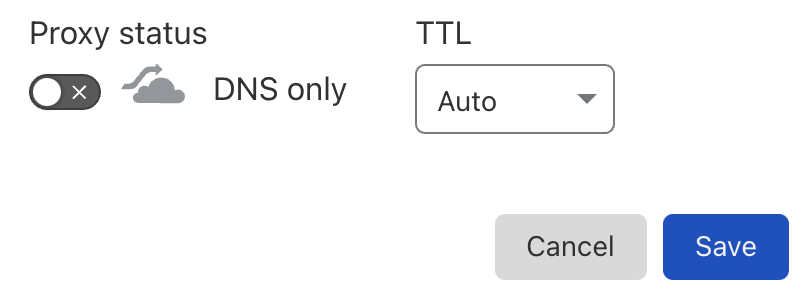
If you are using Cloudflare like me, then make sure to turn off Proxy until we are done with WordOps installation and SSL issuance.
We have successfully connected our domain name to the server. Wait for a couple of minutes for the DNS propogation to happen. Now, move to the next step to install WordOps on our VPS server.
4. Install WordOps
Let’s get started with the WordOps installation.
For this, you will need to use Terminal. On macOS and Linux, you can use the built in Terminal. Or if you are on Windows then use PuTTY or Terminal itself.
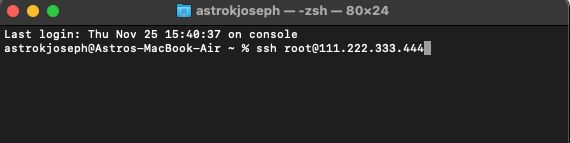
Open Terminal and type the following command to login to your server.
ssh [email protected]Make sure to replace xxx.xxx.xxx.xxx with your server IP address. The default username will be root.
Now you will be asked to enter the password. Just type the password that we specified during Droplet configuration and hit enter.
Do note that while typing or pasting the password, it won’t be made visible. Just hit enter after your type/paste the password.

You are now logged into your server.
Use the below given command to install WordOps on the server.
wget -qO wo wops.cc && sudo bash woDuring the installation, it will ask you to enter your name and email.
Once it done, it will show as:
Reloading Nginx                 [OK]
HTTP Auth User Name: WordOps
HTTP Auth Password : hsdj886TSBI6dgA756shd876
WordOps backend is available on https://111.222.333.444:22222 or https://astrokjoseph.com:22222
WordPress admin user : Astro
WordPress admin password : MyPassword
Nginx-Helper configuration :    http://astrokjoseph.com/wp-admin/options-general.php?page=nginx
Successfully created site http://astrokjoseph.com
Certificate type : domain
Validation mode : Webroot challenge
Issuing SSL cert with acme.sh   [OK]
Deploying SSL cert              [OK]
Securing WordOps backend with current cert
Adding /var/www/astrokjoseph.com/conf/nginx/hsts.conf
Adding HTTPS redirection        [OK]
Updating site url with https    [OK]
Testing Nginx configuration     [OK]
Reloading Nginx                 [OK]
Congratulations! Successfully Configured SSL on https://astrokjoseph.com
It will take some time. Wait for some time until it is installed.
5. Install WordPress on VPS Server
Now it’s time to install WordPress on our VPS server.
Use the command below with necessary edits to install WordPress.
sudo wo site create domain.com --php74 --letsencrypt --wpfc --hsts --user=Astro --pass="MyPassword"Replace the following:
- domain.com with your domain name
- Astro with your desired username
- MyPassword with a password of your choice
Now wait for sometime for the process to complete.
Output:
HTTP Auth User Name: WordOps
HTTP Auth Password : hsdj886TSBI6dgA756shd876
WordOps backend is available on https://111.222.333.444:22222 or https://astrokjoseph.com:22222
WordPress admin user : Astro
WordPress admin password : MyPassword
Now you have successfully installed WordPress on a VPS server.
The next thing is to configure your WordPress website.
6. Configure WordPress
You can login to your WordPress admin dashboard by visiting the address: https://yourdomain.com/wp-admin/. Login using the username and password you specified during the installation.
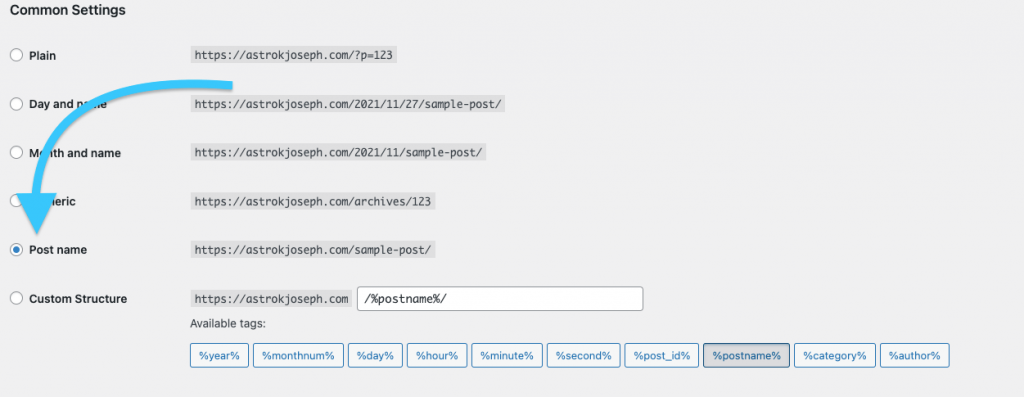
Go to Settings > Permalinks and setup the permalink structure of your choice. It is always recommended to remove date from the URL slug if it is not a news based website.
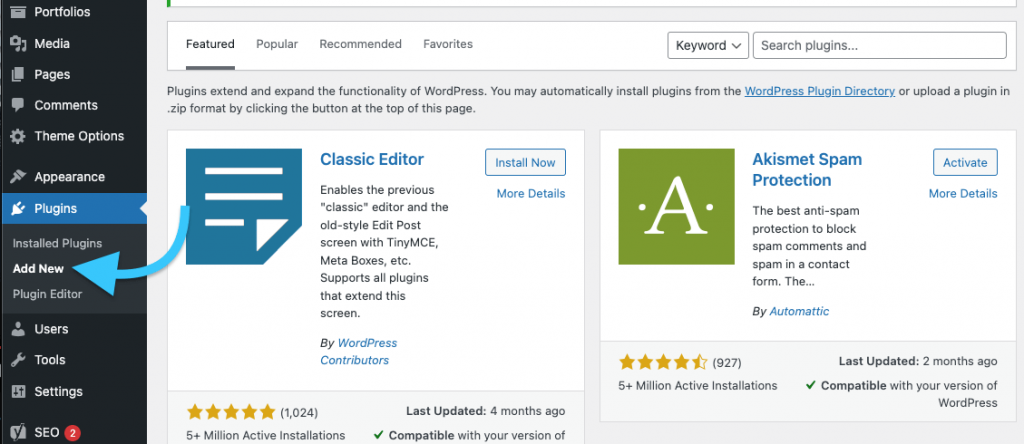
Now head over to Plugins > Add New to add new plugins like SEO Plugin, Contact Form, etc.
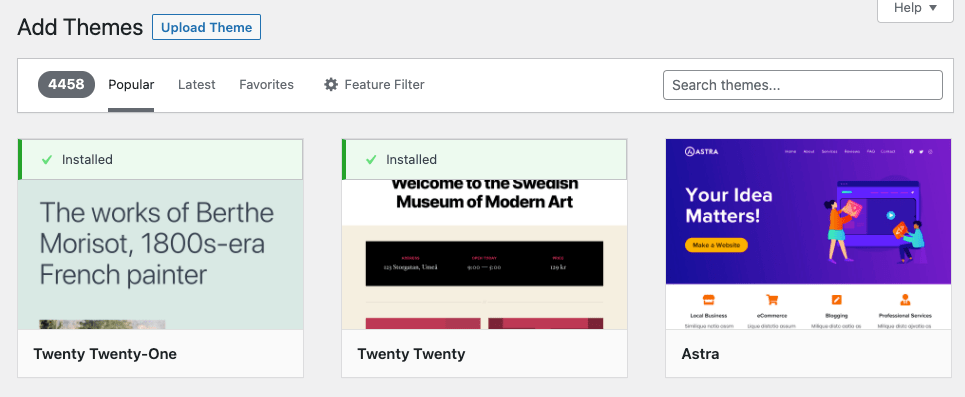
Go to Appearance > Themes > Add new to upload a new theme or install a free theme from the WordPress repo.
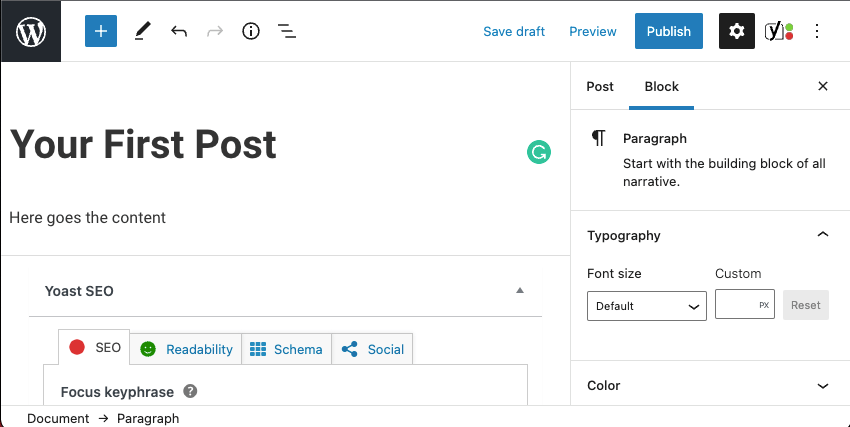
To post your very first article, click on Posts > Add new. Write an article and hit the Publish button to make it live on your website.
Easy WordPress Installation on a VPS
This is one of the easiest method to install WordPress on a VPS server. There are tons of other methods to install WP. We used WordOps to install WordPress on our VPS server. WordOps is an optimized way of installing WordPress using Nginx.
If you have any doubts regarding any steps in the tutorial, make sure to comment the same below and I will get back to you at the earliest.