All thanks to blogging, I started making a handful of money from my school days itself. I am so proud that I never asked for any money from my parents to manage my expenses.
Now, I manage a couple of blogs full-time and it is now making me a good amount of money that is more than enough for me.
Starting a blog was surely one of the best decisions that I took in my entire life. Ever since then, it completely changed my life.
I started my first blog back in 2014 when I was 13 years old. Ever since then I started learning a lot about blogging, search engine optimization (SEO), content marketing, and various other digital marketing skills.
If you too want to live a boss-free life and want to make at least $5,000 every single month then you are at the right place.
In this article, I will explain everything that you need to know about starting a blog from scratch. In short, this is the ultimate guide for people who are looking to start a new blog in 2025.
What is a blog?
In simple words, a blog is a website where we publish various content related to the niche that we are in. A blog is all about content. A person or a group of people regularly updates or adds content to a blog to keep it updated. We use a CMS or Content Management System like WordPress to create and manage a blog.
In this article, we will making a WordPress-based blog in less than 20 minutes.
Pick A Blog Niche and Brainstorm a Name
So, here comes the very first step of starting a new blog – finding a blog topic and a name.
No, I am not telling you that you should start a blog on a topic or niche that you are passionate about or interested in. When selecting a blog topic, there are tons of things that you need to keep in mind.
You cannot start a blog purely based on your passion and convert it into a real business. Not all niches can be scaled equally.
Before selecting a blog niche to start with, you need to come up with answers to some questions.
- In which niche I am experienced?
- Am I knowledgeable enough to start a blog on XYZ topic?
- Do I have any expertise or leverage points in the industry?
As mentioned earlier, you shouldn’t go ahead and blindly start a blog on any random topics. There are certain things that you need to keep in your mind before finalizing the niche.
Here are some tips to easily figure out what niche to start with:
- Is the topic/niche vast enough to write enough content
- Get a little idea about the competition and already established players
- Various monetization opportunities
- Future projection and trends of niche
- etc
These are a few points that you should keep in mind and questions you should ask yourself before starting a blog.
Now that you know the topic next is to find a blog name.
Here are some tips to select a perfect blog name:
- Keep it simple
- Keep it short
- You can either go with something related to the industry or go with a brand name or even start a blog based on your name, like this blog.
- See if the domain name is available (preferably .COM)
- See if the name is trademarked or if the name is being used by any other company or brand
- See if you can get the exact same name as username on various social media platforms
Once you have figured out both the topic and name, now its time to register a domain name for our new blog.
Register A Domain Name
The domain name is the virtual address of our blog or website. It is this URL/address that people enter into the address bar of their web browser to reach your website.
Our domain name should be simple, short, and easy to remember.
There are various domain registrars from where you can purchase a domain name. As for the extension, you can go with any leading TLD like com, net, org, etc. But personally, I prefer .com.
You can go ahead and register your domain name with any registrar but companies like Bluehost give you a free .com domain name when you purchase hosting from them (more on this below).
Since you are just getting started, I will recommend you start with basic shared hosting and then later upgrade. This way, you can save some money, get a free domain and escape from the difficulties of managing a VPS server like DigitalOcean or Vultr.
Get Your Blog Online (Get a Hosting)
After domain, another important thing for starting a blog is hosting. Web hosting or simply hosting is the server where we store our website files including WordPress files, images, database, etc.
There are mainly three types of hosting:
- Shared hosting – Simplest web hosting which is easy to set up, use, and manage. You don’t need much technical skills to get started with shared hosting.
- VPS hosting – VPS aka Virtual Private Server is a bit more advanced type of hosting than shared hosting which offers superior performance but requires you to manage everything from start to end. If you are just getting started, you might find installing WordPress on VPS overwhelming.
- Dedicated hosting – As the name itself suggests, these are dedicated server for your website alone. In simple words, an entire server will only host your website and you get exclusive access to all resources.
As you are just getting started and, our primary aim is to start a website and not managing the server, I would suggest you go with cPanel based shared hosting, which is easy to manage and setup even if you have no prior knowledge about the same.
Get a Hosting and free domain
Step 1: Head over to Bluehost.com’s hosting section or try Cloudways managed hosting.
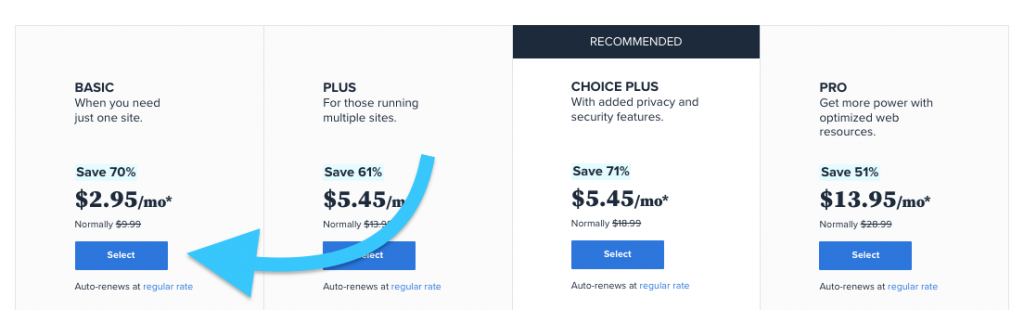
Step 2: From here, select a hosting plan of your choice. The BASIC plan which costs $2.95 will be more than enough for you to host a single website. Click on the Select button.
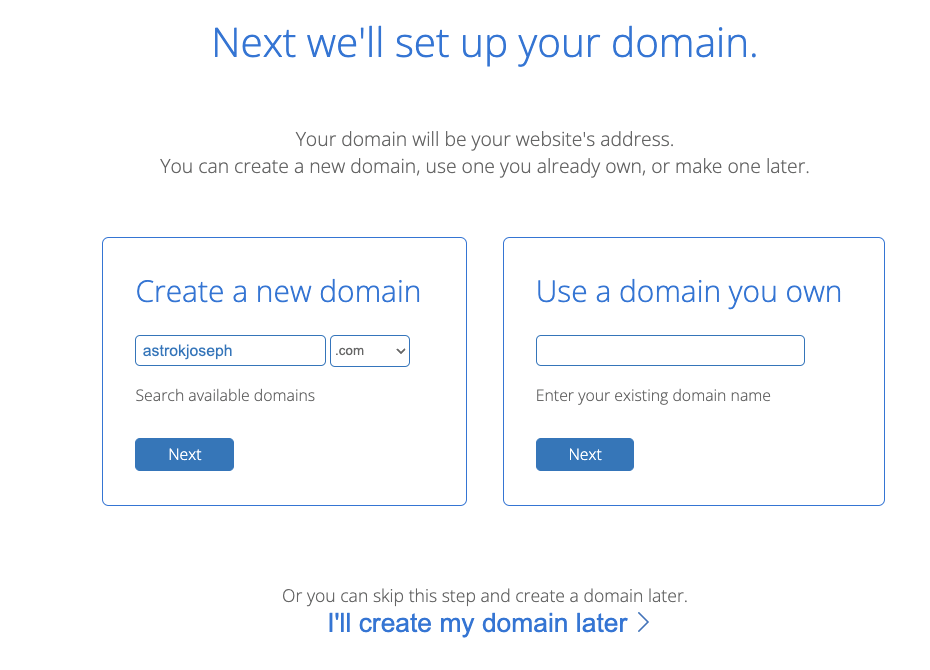
Step 3: Next, you need to type your domain name that you finalized earlier. Just enter the domain name and click on Next.
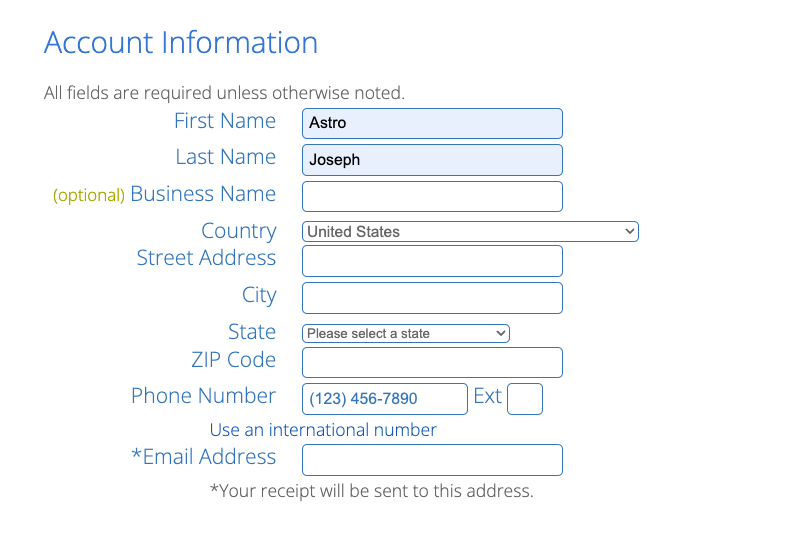
Step 3: Enter basic account details like the name, email, address, phone number, and finally complete the payment. (Make sure to uncheck items like SiteLock Security, CodeGuard, SSL, etc)
Now we are done with the first part of the setup which is registering a domain name and buying hosting.
Next, we need to install WordPress and setup our new blog.
Install WordPress
WordPress is the most popular content management system (CMS) out there. WordPress has a 60% market share and almost 14.7% percent of the world’s top websites use WordPress.
WordPress is extremely easy to use and customize. You can further add more options and features to your WordPress website by adding plugins and customize the look by adding any themes as well. (We will discuss both in this article itself.)
Now, let’s proceed with WordPress installation.
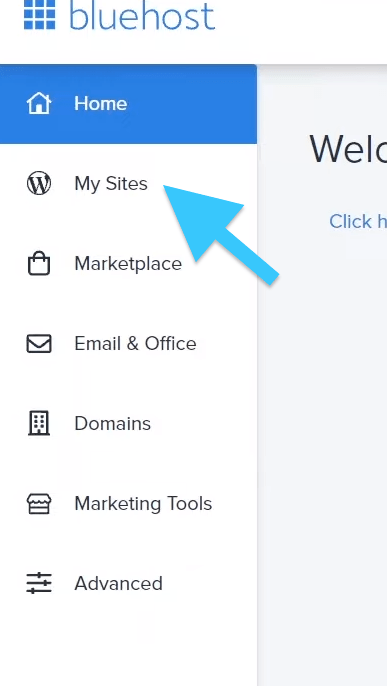
Step 1: Log in to your Bluehost dashboard and click on the My Sites option on the left side
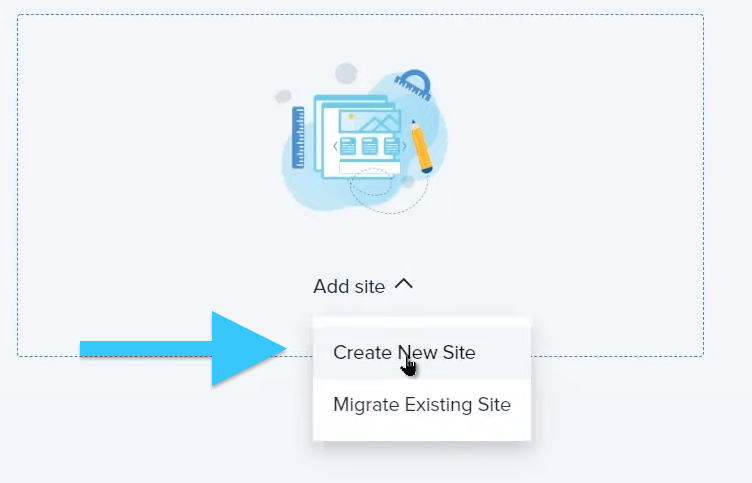
Step 2: Click on Add site and then on Create New Site
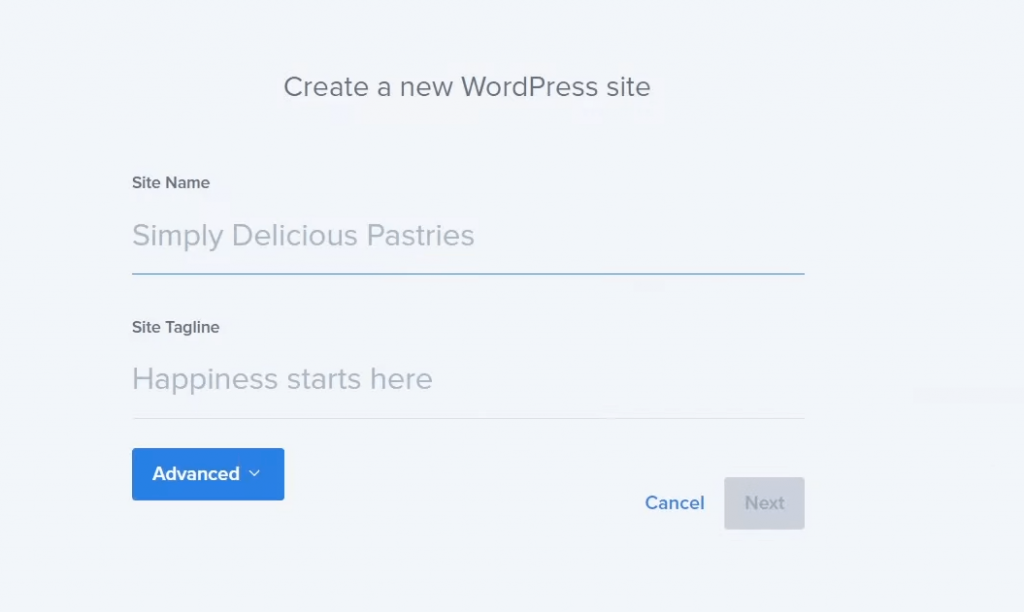
Step 3: Now it will ask you to enter the blog name and tagline
Step 4: Select the domain and click on complete. Wait for a few seconds and it will automatically set up WordPress for you.
Once done, click on the Login to WordPress button to log in to your WordPress dashboard.
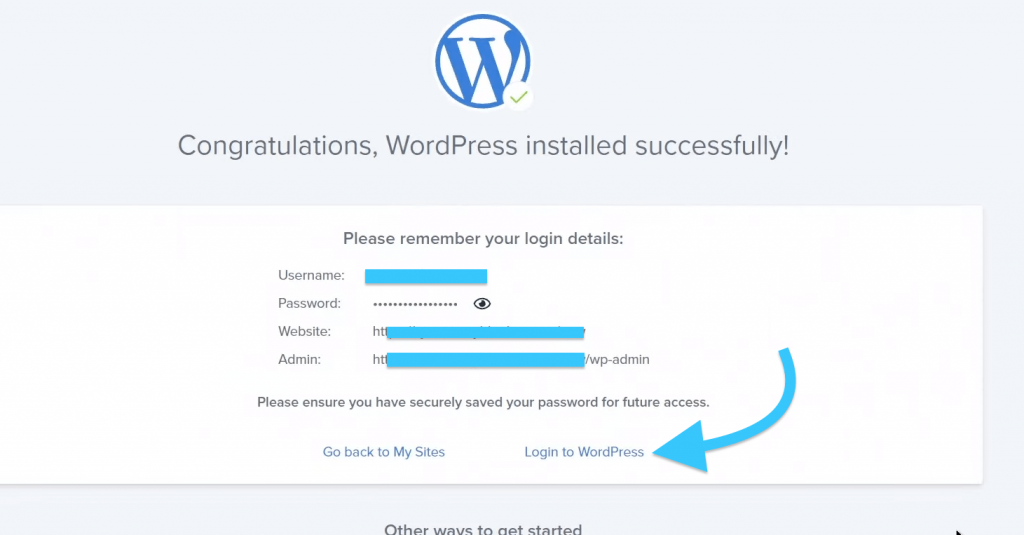
Voila. You have successfully installed WordPress.
Tweak WordPress Default Configuration
Now WordPress is setup based on default settings. There are certain things that we need to change as soon as we install WordPress.
Let’s take a look at things that you need to change right away.
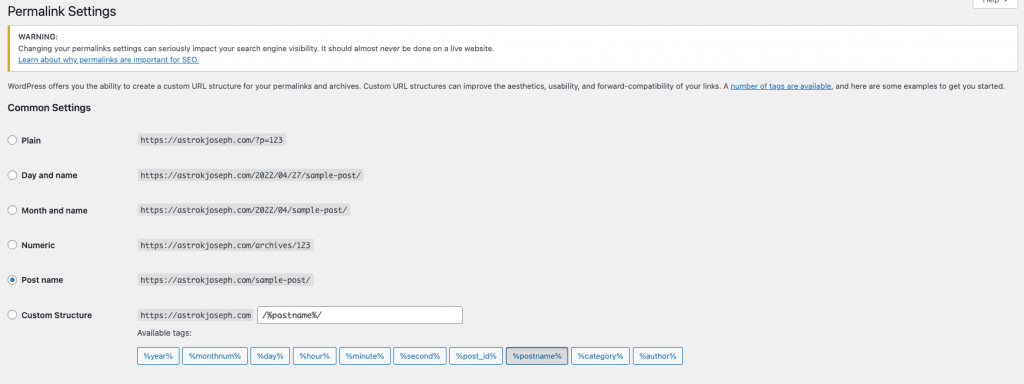
- Firstly, you need to change WordPress permalink structure. Just head over to Settings > Permalinks. Here, you need to change the type to Post name
- Change Default Preferences – Next step is to go through default preferences and change it according to yours. For example, you might want to change the country, time zone, bio, name structure, date structure, start day of the week and more. Just go through the settings page and change necessary settings.

- Delete Default Posts, Pages and Comments – After fresh installation of WordPress, it will have a dummy post, page, comment and plugin. Just delete them right away as we do not need them.
Setup a WordPress Theme
Now that we have installed WordPress on our web host, next we need to give it a nice look by applying a WordPress theme.
WordPress is immensely customizable. You can change the look and feel of WordPress anyway you like it.
When it comes to themes, there are both free as well as paid themes for WordPress.
Since we are just getting started, a free theme will be more than enough.
Follow the below given steps to activate a new theme of your choice. The WordPress theme repo contains tons of good looking themes which are free to use. If you want more good looking themes with advanced features then you might want to purchase a premium theme from websites like Themeforest.
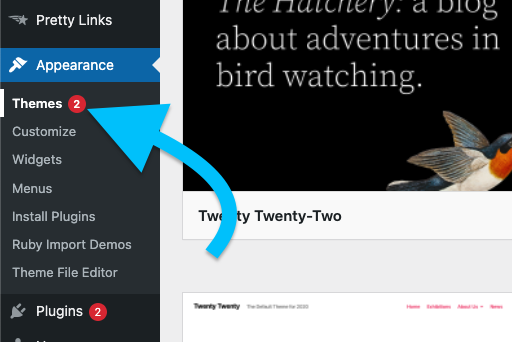
Step 1: Login to your WordPress dashboard. Hover over Appearence and click on Themes
Step 2: Click on the Add New button to install a new WordPress theme on your blog
Step 3: You can search for any theme from the WordPress repo itself. All of these themes will be completely free to use. Below given are a few popular free themes:
- Astra
- OceanWP
- Kadence
- GeneratePress
Step 4: If you purchased a theme from sites like Themeforest then click on the Upload Theme button from the top left side and upload the zip file to install it.
Step 5: You also have the option to preview theme before installing. Just click on the Preview button to see how your website will look like if you install that particular theme.
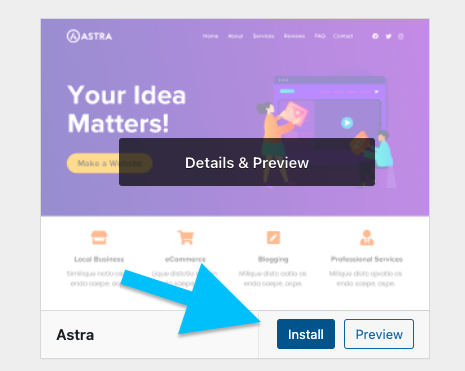
Step 6: Finally, click on the Install button and then Activate it. Go through the theme documentation and further customize the theme according to your liking.
Setup Necessary WordPress Plugins
In order to add extra features and options, we need to install various WordPress plugins. Follow the steps given below to install a plugin on your newly created WordPress blog.
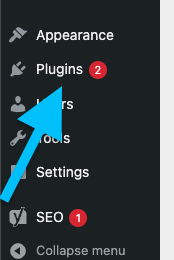
Step 1: Go to your WordPress dashboard and click on Plugins
Step 2: To the top right side you’ll find a search bar. You can search for various plugins here.
Step 3: After finding the required plugin, click on the Install button to install it and finally Activate button to make it live on your website.
Below given are a couple of plugins that you might want to use in your WordPress blog.
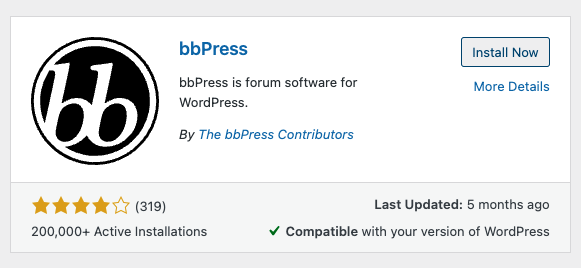
Yoast SEO
Yoast SEO is a plugin that will help you to optimize your blog for search engines. It will let you add meta description to posts, manage robots.txt file, generate an XML sitemap and more.
Contact Form 7
For visitors to contact you, you need to setup a contact from on your blog. Contact Form 7 is a simple and light weight WordPress plugin that will help you to add a custom contact form easily.
WP Rocket
No one likes a slow loading website. We need to make sure that our website loads fast. WP Rocket is a caching and WordPress speed optimization plugin that will let you speed up WordPress for load time.
ShortPixel
ShortPixel is an image compressor and optimizer plugin for WordPress. Oftentimes, the images and screenshots that we upload to our blog will be huge in term of size. ShortPixel will automatically compress the images and makes your website load faster.
These are some of those plugin that you can add to your blog. Depending on the features you want, you can easily research and add more plugins.
Write Your First Post
Now your blog is fully ready to post content. Here comes the important part – Posting content.
Let’s go through the basics of posting a post on WordPress using the Gutenberg post editor.
In this section, I will only cover the basics of using the WordPress post editor to post content. If you want to know how to write an SEO optimized article then make sure to checkout our article on the same.
Login to your WordPress dashboard and click on Posts > Add new
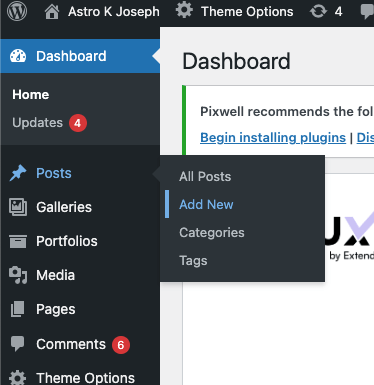
Now the WordPress post editor (Gutenberg Editor) will open up.
First up, you need to type the title of the article. It will be in H1 tag.
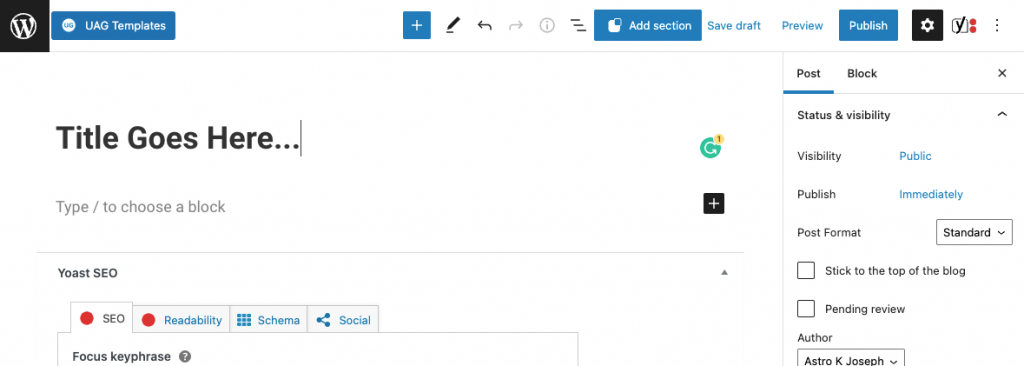
Next, you start writing your actual content.
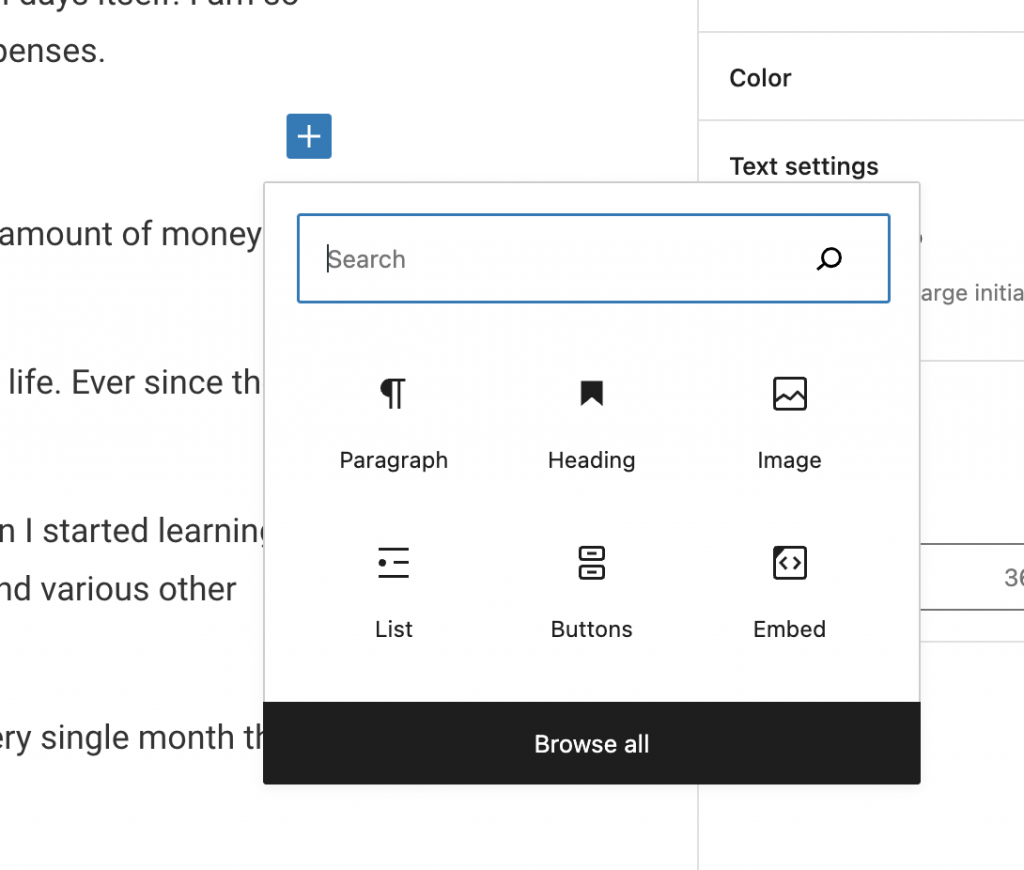
Just click on the Plus button to add new blocks. You can add various kinds of blocks including:
- Paragraph
- Headings
- Images
- List
- Buttons
- Columns
- Shortcodes
- Embedded content and more.
Now it’s time for you to mix and match various Gutenberg blocks and format your article as well. Once you are done with writing the article, next we need to specify the category, tag, featured image, etc.
On the left side, under Post settings, you can add a new category, and tag. Also upload or select a featured image as well.
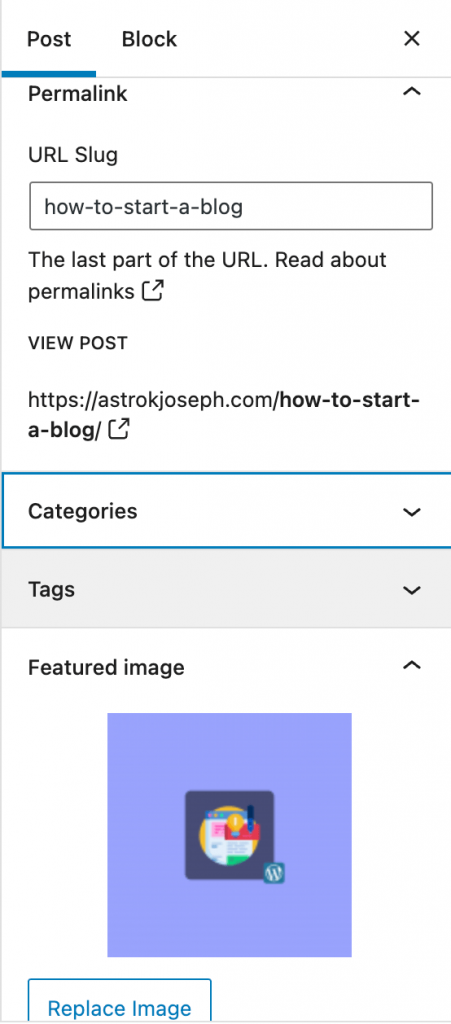
To optimize your article for SEO, use the Yoast SEO plugin to add meta description. Specify the focus keyword and then optimize your blog post for both SEO and readability.
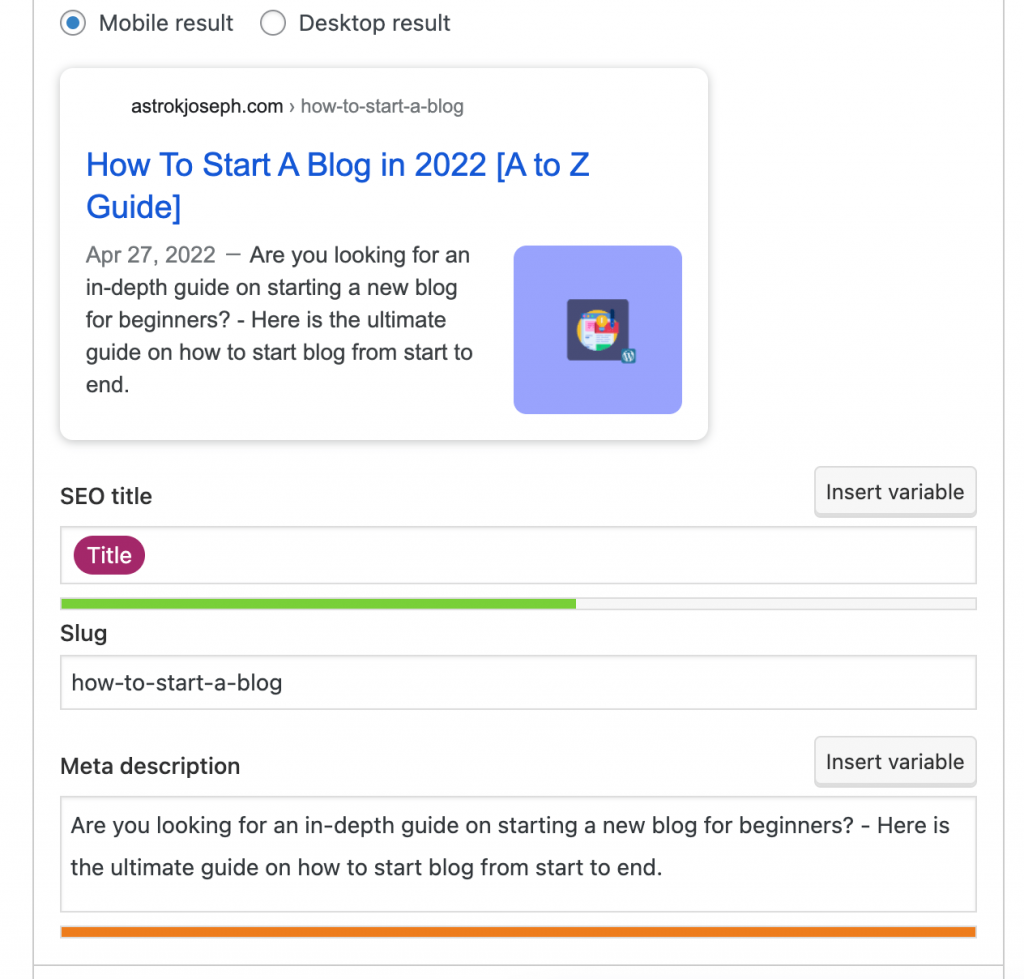
Finally, once you are done, click that Publish button to make your very first post love on your blog.
You may even use AI writing tools like Creaitor.ai to write long articles in relatively less time as well.
Conclusion
By now, you might have already understood that starting a new blog is simple and easy. This is an ultimate guide on starting a new blog for beginners. Now let’s go through the steps once again and summarize what we did.
- Brainstorm and come with a blog niche and a name
- Register the domain name
- Get a web hosting to host our WordPress blog
- Install WordPress
- Install and configure a WordPress theme
- Setup necessary WordPress plugins
- Make little tweaks to default WordPress settings
- Post your first article
- Promote your blog
- Search Engine Optimization
- Scale up!
If you have any doubts, make sure to comment down below and I will get back to you at the soonest.