
Are you looking for a working tutorial to set up a business email on your domain for free? Well, you are in the right place.
Having a business email based on your domain makes you seem like a reputable company. Let’s say you receive an email from a person having a business email and another one from a generic Gmail or Outlook ID. Which one would you say is more reputable and professional? Of course, the custom domain-based email, right?
In this article, I’ll show you how to set up a free business email based on your domain in less than five minutes. So let’s get started.
What is a Business Email?
A business email simply refers to an email ID that’s based on the company’s website domain.
Let’s take my business email for example. I have created an email [email protected] which looks professional and more premium.
It’s for sure that almost everyone gets bombarded with tons of emails from people using generic email services like Gmail, Outlook, etc. Having a custom domain-based business email is a great way to stand out from the crowd.
Also, if you are serious about your business and want to be more reputable, then it’s advised that you get a business email.
Can I Get Business Email for Free?
Yes, you heard it right. You can now get a business email for free.
If you were about to use services like Google Workspace or any other similar service providers then you would have to pay for it. But we are going to discuss a method by which you can get a fully functional professional email address based on your domain for free.
This literally means that the email will be free forever and you are not required to pay anything in order to use it. You may send an unlimited amount of emails and receive any number of emails as well. So let’s see how to get a free business email.
How to Setup Free Business Email?
We are going to use a service called Zoho for this purpose.
Zoho is a company that focuses on web-based business tools. They offer free business email for everyone. All you need is a Zoho Mail account and you are all good to go.
Follow the tutorial given below to get started.
As the first step, head over to Zoho and sign up for a new account.
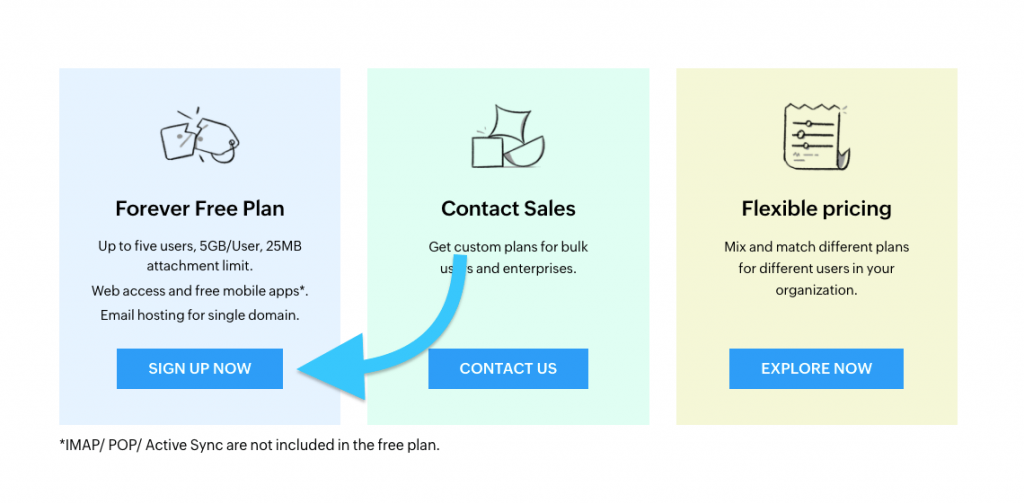
Head over to the plans and pricing page. From here, click on to get started button under the free plan. The free plan gives you the option to add up to five users and each user gets up to 5GB space and a 25MB attachment limit as well.
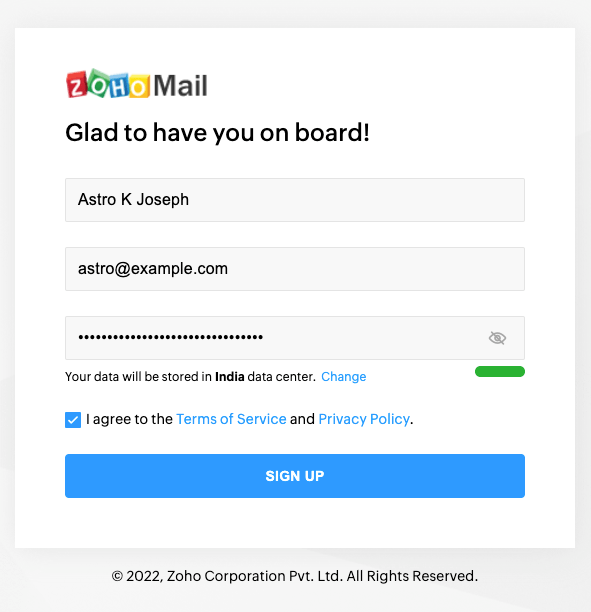
Now you need to enter basic registration details like the name, email, mobile number, and password. Agree to the terms and click on the Sign-up button to continue.
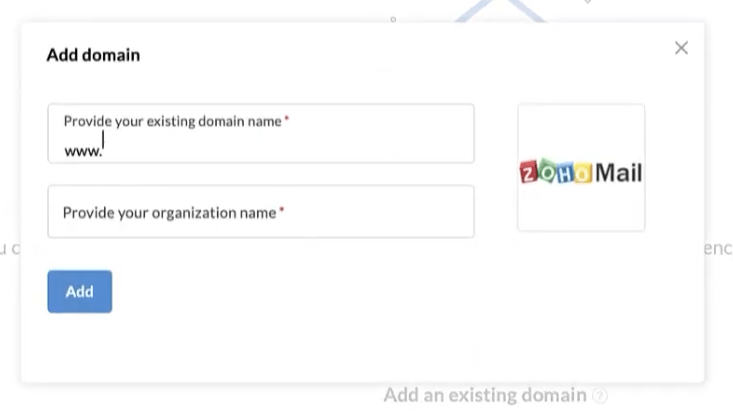
Now you need to verify your account. Once verified, you need to enter the domain name and organization name and click on the Add button
Now go to the domain verification page. Here we need to verify the domain ownership to process further. It is as simple as adding a DNS entry to your DNS manager.
As for the verification, you have three options:
- CNAME Method
- TXT Method
- HTML Method
The simplest one will be to verify the domain using the TXT method.
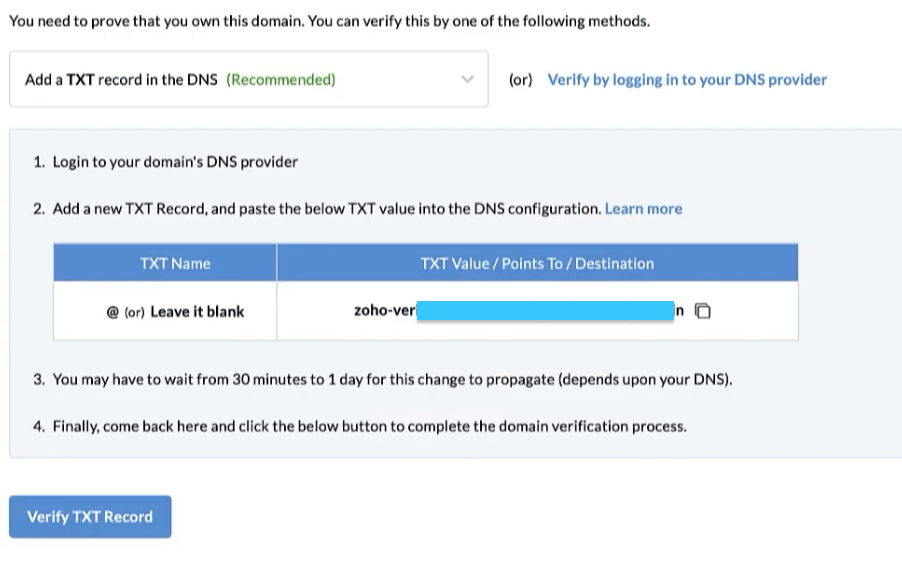
Open your domain’s DNS manager and proceed to enter a new TXT record. Enter the content as given and save the settings
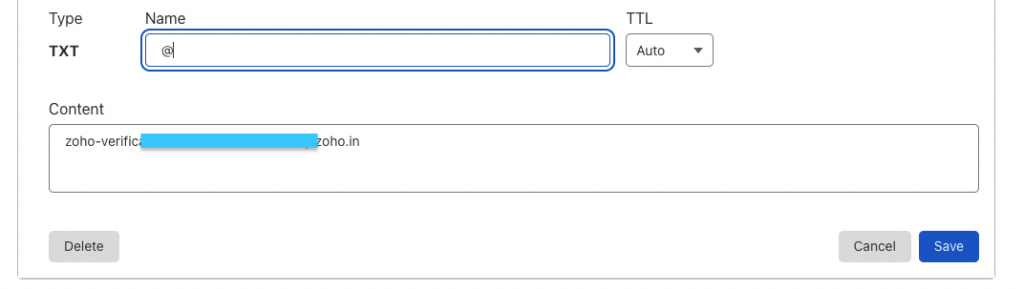
Click on the Verify TXT Record button
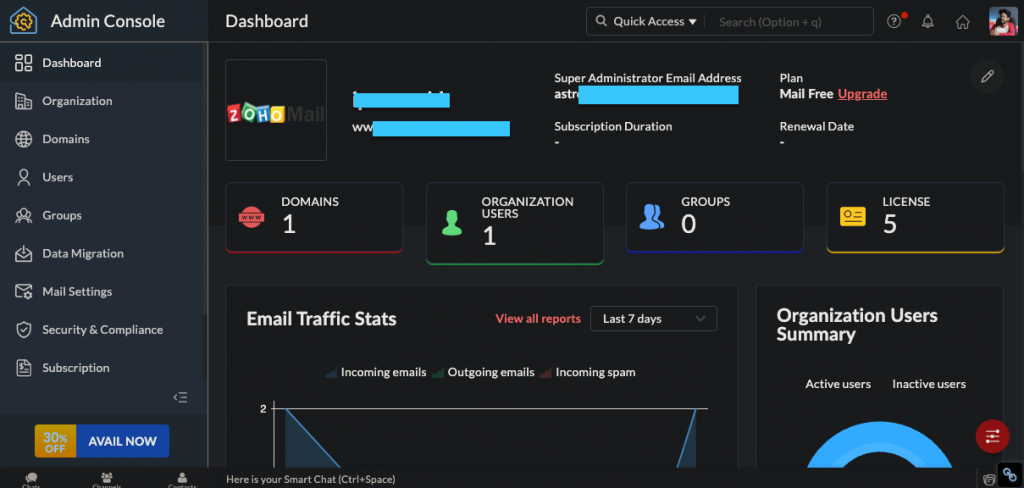
Now you need to create a super administrator email. For this, enter the username that you would like to use with your domain. It will be your business email. Click on the Create button.
If needed, you may add additional users and create user groups as well.
The next step is configuring email delivery.
Again go to your domain’s DNS Manager and click on add a new record.
Select the type as MX and add the three entries given on the Email setup page.
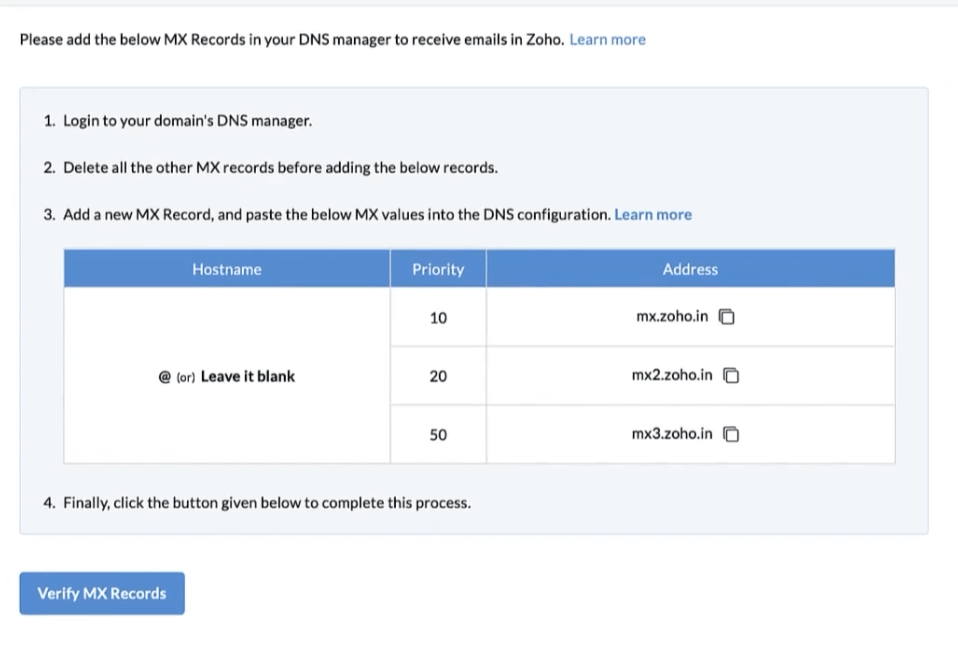
All three of them should be MX records, priority as 10, 20, 50, and Address mx.zoho.in, mx2.zoho.in and mx3.xoho.in respectively.

Adding these MX records is crucial as it will make sure that all your emails are configured.
Also, note that if you have any other MX records added in the DNS Manager then make sure to remove them if not used.

After adding all three MX records, click on the Verify MX Records button to complete the verification.
Now let’s Configure SPF and DKIM. This will have help to verify your domain’s authenticity and validity.
Once again go to your domain’s DNS Manager.
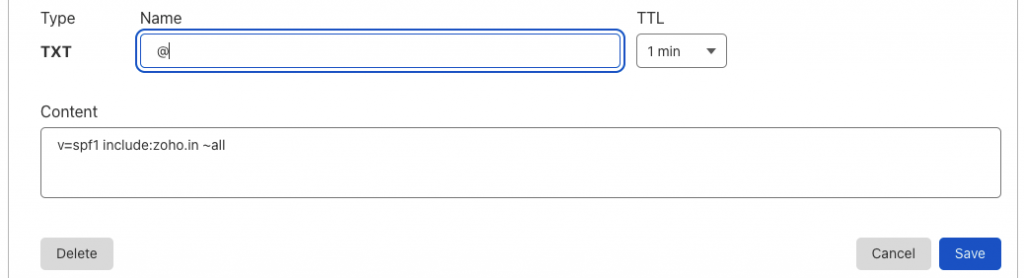
Click on add new record and select TXT type.
Copy the TXT value given in the DNS Mapping (Sender Policy Framework (SPF)) page of Zoho and enter the same in the DNS manager
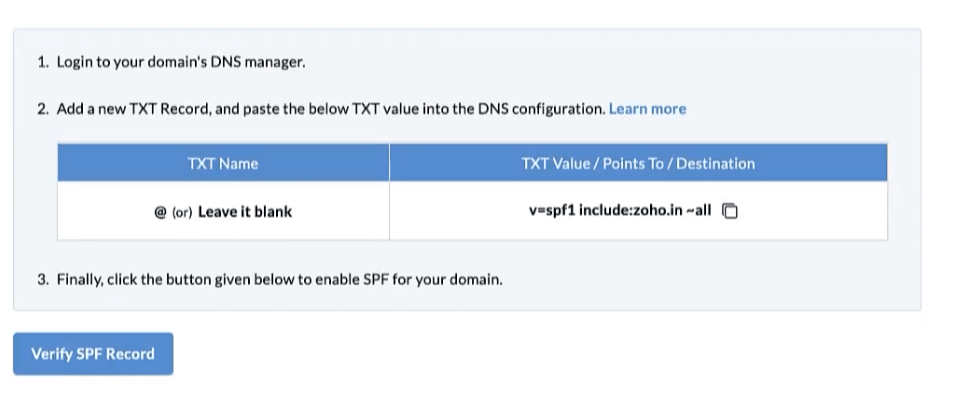
Once added, save the DNS value
Click on the Verify SPF Record button on Zoho to complete SPF record verification.
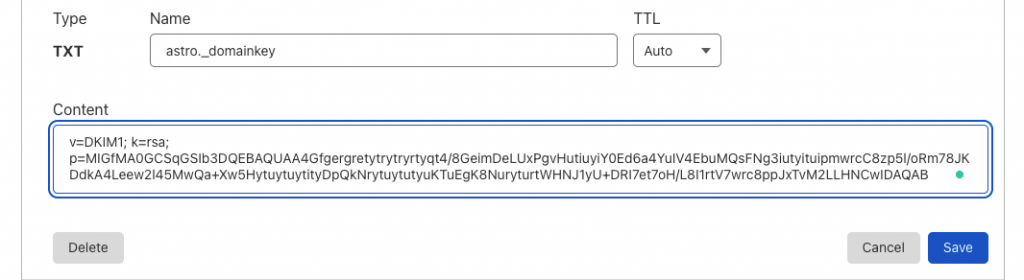
Next move to the DOMAIN KEYS IDENTIFIED MAIL (DKIM) section and copy the TXT record content.
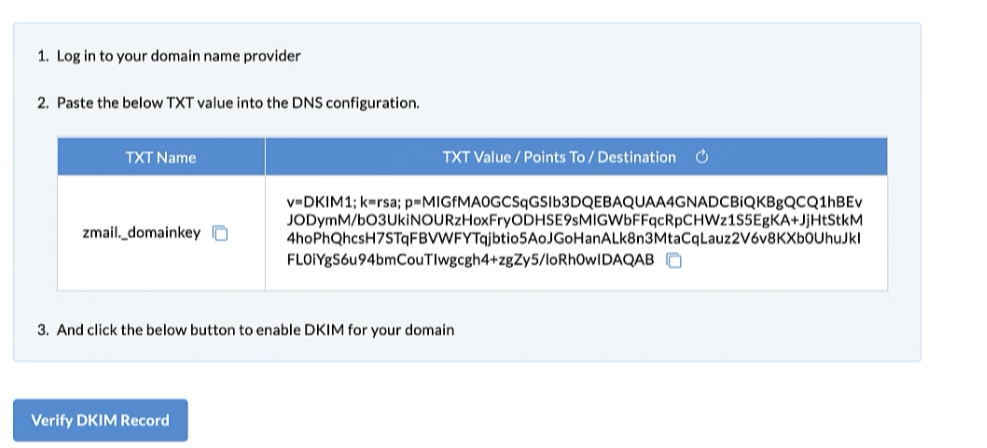
From the DNS manager, add a new TXT record with the copied info and save settings.
Go back to Zoho and click on Verify DKIM Record button to complete verification.
Once everything is done, your new business email is ready to use.
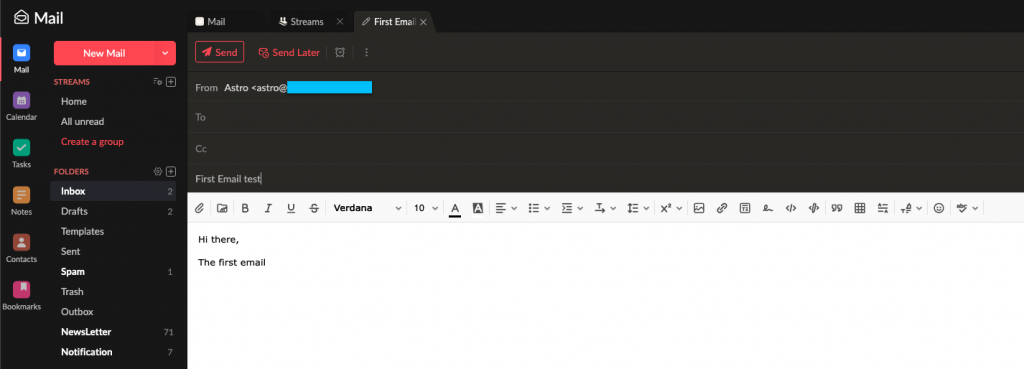
Send your first email and that’s it, the whole process is done.
Final Words
Having a custom business-based email is very important these days. Zoho is a free platform that offers free business email for everyone. If you are just getting started and do not have enough budget to subscribe to Google Workspace or any other service provider then Zoho would be your perfect bet.
If you have any doubt regarding the setup of Zoho business email then make sure to comment down below and I will get back to you.